Paint correction lives in the thin space between optics and materials science. A swirl is not a color, it is a directionally aligned scratch that scatters light. Haze is not a tint, it is a field of micro marring that lowers contrast and kills depth. When a panel looks flat, dull, or webbed under the sun, the clear coat is telling you a physical story written in microns.
What your eyes actually see
Under point light, a glossy panel returns a clean, sharp highlight because the clear coat acts like a smooth lens. Micro defects interrupt that path. Even shallow scratches create tiny canyons whose edges refract and reflect light away from your eyes. The result appears as gray halos circling the sun or a shop light. Rotate the light source or your viewing angle and the pattern shifts, which is why a car can look fine in shade and terrible at the pump under canopy lighting.
Haze is a different beast. If swirls are distinct lines, haze is the fog between them. It happens when abrasives or dirty pads leave uniformly shallow micro trails. The panel might feel slick yet still look milky. On dark colors, this dull veil can be more offensive than a few isolated scratches because it destroys the panel’s dynamic range. Black should show jet black lows and bright, sharp highlights. Haze erases both.
The layered anatomy of automotive paint
Most modern vehicles carry a stack: e-coat on bare metal for corrosion resistance, primer-surfacer that levels the substrate, base color coat, and a clear coat that provides gloss and UV protection. The total film build on factory finishes typically lands somewhere between 90 and 140 microns, though you will find outliers. Clear coat is usually only a fraction of that, roughly 30 to 60 microns. For comparison, a human hair is around 70 microns thick.
Single-stage paint, still found on some restorations and a handful of modern applications, has pigment and resin together without a separate clear. It oxidizes and transfers color onto pads during correction. Repaints and body shop panels can stray far from factory norms. They may have more total film build, but that does not guarantee a thicker, harder clear. The chemistry and bake process dominate the behavior more than the thickness alone.
How defects form in the first place
Bad washing is the number one culprit. Dragging grime across the panel with a sponge or a bone-dry towel cuts micro channels into the clear. Automated brush washes are worse because the bristles act like loaded scouring pads. Even well-meaning owners cause trouble when they quick wipe dust with a paper towel before dinner. Sand, pollen husks, and road grit all have edges. Give them pressure and motion, they give you swirls.
Then there are RIDS - random isolated deep scratches - from keys, belt buckles, or a dirty snow brush. Acidic bird droppings and bug remains etch the clear once they react and sit warm. Water spots, particularly from hard water baked by sun, form mineral crowns that require mechanical removal. On white and silver cars these hide in plain sight until a strong LED exposes them.
Shops also create defects accidentally. A rotary at high speed on a soft panel can hologram the surface. A finishing polish on a dirty pad can micro-mar an entire hood. Silicone-heavy glazes can fill defects and trick the eye until the first wash strips the oils.
Measuring before moving
Paint correction is reduction. You remove a tiny, controlled amount of clear to level the peaks down to the valleys. Once you understand that, measuring becomes non-negotiable. A decent paint thickness gauge reads total film build on metal panels. On aluminum and plastic, readings can be unreliable unless you use higher-end gear. Even basic gauges help map risk. If a hood reads 95 microns, and a door reads 130, your strategy changes panel to panel.
Spot measurements matter. Edges and body lines are notoriously thin because paint flows away during application and can be sanded more during factory leveling. That is where people burn through. We mark thin zones in chalk or tape and adjust pad, pressure, and machine angle to keep these safe.
Solvent tests and panel wipe-downs help separate filling from true correction. A perfectly glossy test section that hazes after an IPA wipe was never corrected, it was disguised with oils. At Os Pro Auto Detailing, we treat that as a diagnostic failure, not a marketing win. The only honest finish is one that looks identical before and after a wipe.
Compounds, polishes, pads, and machines - how they actually cut
A compound is a slurry of abrasives in a carrier. Two major abrasive behaviors dominate: diminishing and non-diminishing. Diminishing abrasives fracture while you work, starting aggressive and refining as they break down. Non-diminishing abrasives hold shape and cut until you stop. Neither is inherently better. Diminishing can finish cleaner on softer paints, but if you underwork them they leave micro trails. Non-diminishing rewards consistent cycle control and yields repeatable results, especially when chasing a specific defect removal rate.
Pads are levers. Foam pads vary in pore size, density, and resilience. Microfiber pads cut fast because the fibers hold abrasives at the tips, acting paint protection film like a thousand tiny planes. Wool breathes and runs cool, great for rotaries and large defects, but it can require careful follow-up to remove the micro texture it imparts. Thin pads transmit machine movement and pressure more directly, which can help on hard clears but hurt on edges.
Machine type determines motion. Dual action polishers mix rotation with oscillation, which reduces heat concentration and makes them safer for most users. Long-throw DA machines cover ground quickly and correct well on most modern paints. Rotary polishers spin on a single axis, which can refine or destroy depending on technique. They excel in experienced hands for defect removal and lensing clarity, but they make heat quickly and will chase you if you tilt or let the pad load.
Heat, pressure, and motion
Correction is a balance of three dials: heat, pressure, and motion. Heat softens the clear, which can be good to a point. Too much heat swells the resin and hides defects temporarily, then the panel cools, and the defects reappear. Pressure increases cut but if you collapse the foam, the pad stops rotating and starts skating, leaving haze. Motion spreads the work. Small, controlled overlapping passes build uniformity, while racing around the panel creates patchwork.
Dirty pads are the quiet saboteurs. Dried clear and abrasive dust pack the face and turn a finishing pad into a sanding block. Cleaning on the fly with compressed air or a dedicated pad brush preserves the pad’s intent and stops haze.
A working blueprint for safe paint correction
- Map the paint. Measure film build where possible and inspect under at least two light types, such as high CRI LEDs and sunlight. Start with the least aggressive combo that achieves measurable improvement, then step up only as needed. Work small sections and track temperature with touch or an infrared thermometer, especially on dark colors. Clean pads frequently and change them often. A fresh pad can cut more gently than a loaded pad of the same type. Verify results with a panel wipe and cross lighting before moving on.
Edge cases that separate amateurs from professionals
Soft Japanese clears, like certain Mazdas and Subarus from the past decade, mar if you look at them wrong. They will correct easily, then haze during the wipe. The answer is careful pad choice and finishing polishes that truly refine without sticky residue. On the other end, some German clears, especially older Audi and BMW formulations, laugh at mild combos. You will need microfiber or wool and a stout compound to move the needle, then a disciplined finishing step to restore clarity.
Single-stage reds and whites oxidize fast and clog pads with pigment. You can clear an entire pad face red in one hood. That load changes the pad’s behavior minute to minute. More blowouts and more pad swaps are the only sane response.

Resprayed panels bring surprises. Body shops sometimes bury dust nibs and then sand them out, leaving thin spots around the repair. Solvent pop, dieback, and texture mismatch all play into how aggressively you can approach a given section. If a panel has obvious orange peel that does not match adjacent factory panels, a customer might ask to flatten the texture. That is a wet-sanding job with much higher risk. The conversation shifts from swirl removal to material subtraction in the 5 to 10 micron range per sanding step, which must be measured and justified.
Trim and edges are risk multipliers. Bumpers often use flexible clears that behave softer and clog pads. Plastic panels shed heat poorly, so you reach the danger zone quietly. Tape, patience, and lighter combos around these areas are not optional.
How Os Pro Auto Detailing maps a correction plan
Every car arrives with a story, and we listen before we sand a single micron. At Os Pro Auto Detailing, the intake is a quiet ritual: light walk, thickness mapping, pad and polish test on a taped square, and a candid discussion about outcomes. A commuter white SUV with 120,000 miles and automatic wash scars does not need concours perfection. It needs uniform gloss and safe protection for the next three years. A black coupe that lives under LEDs deserves every bit of clarity you can coax without thinning it to risk.
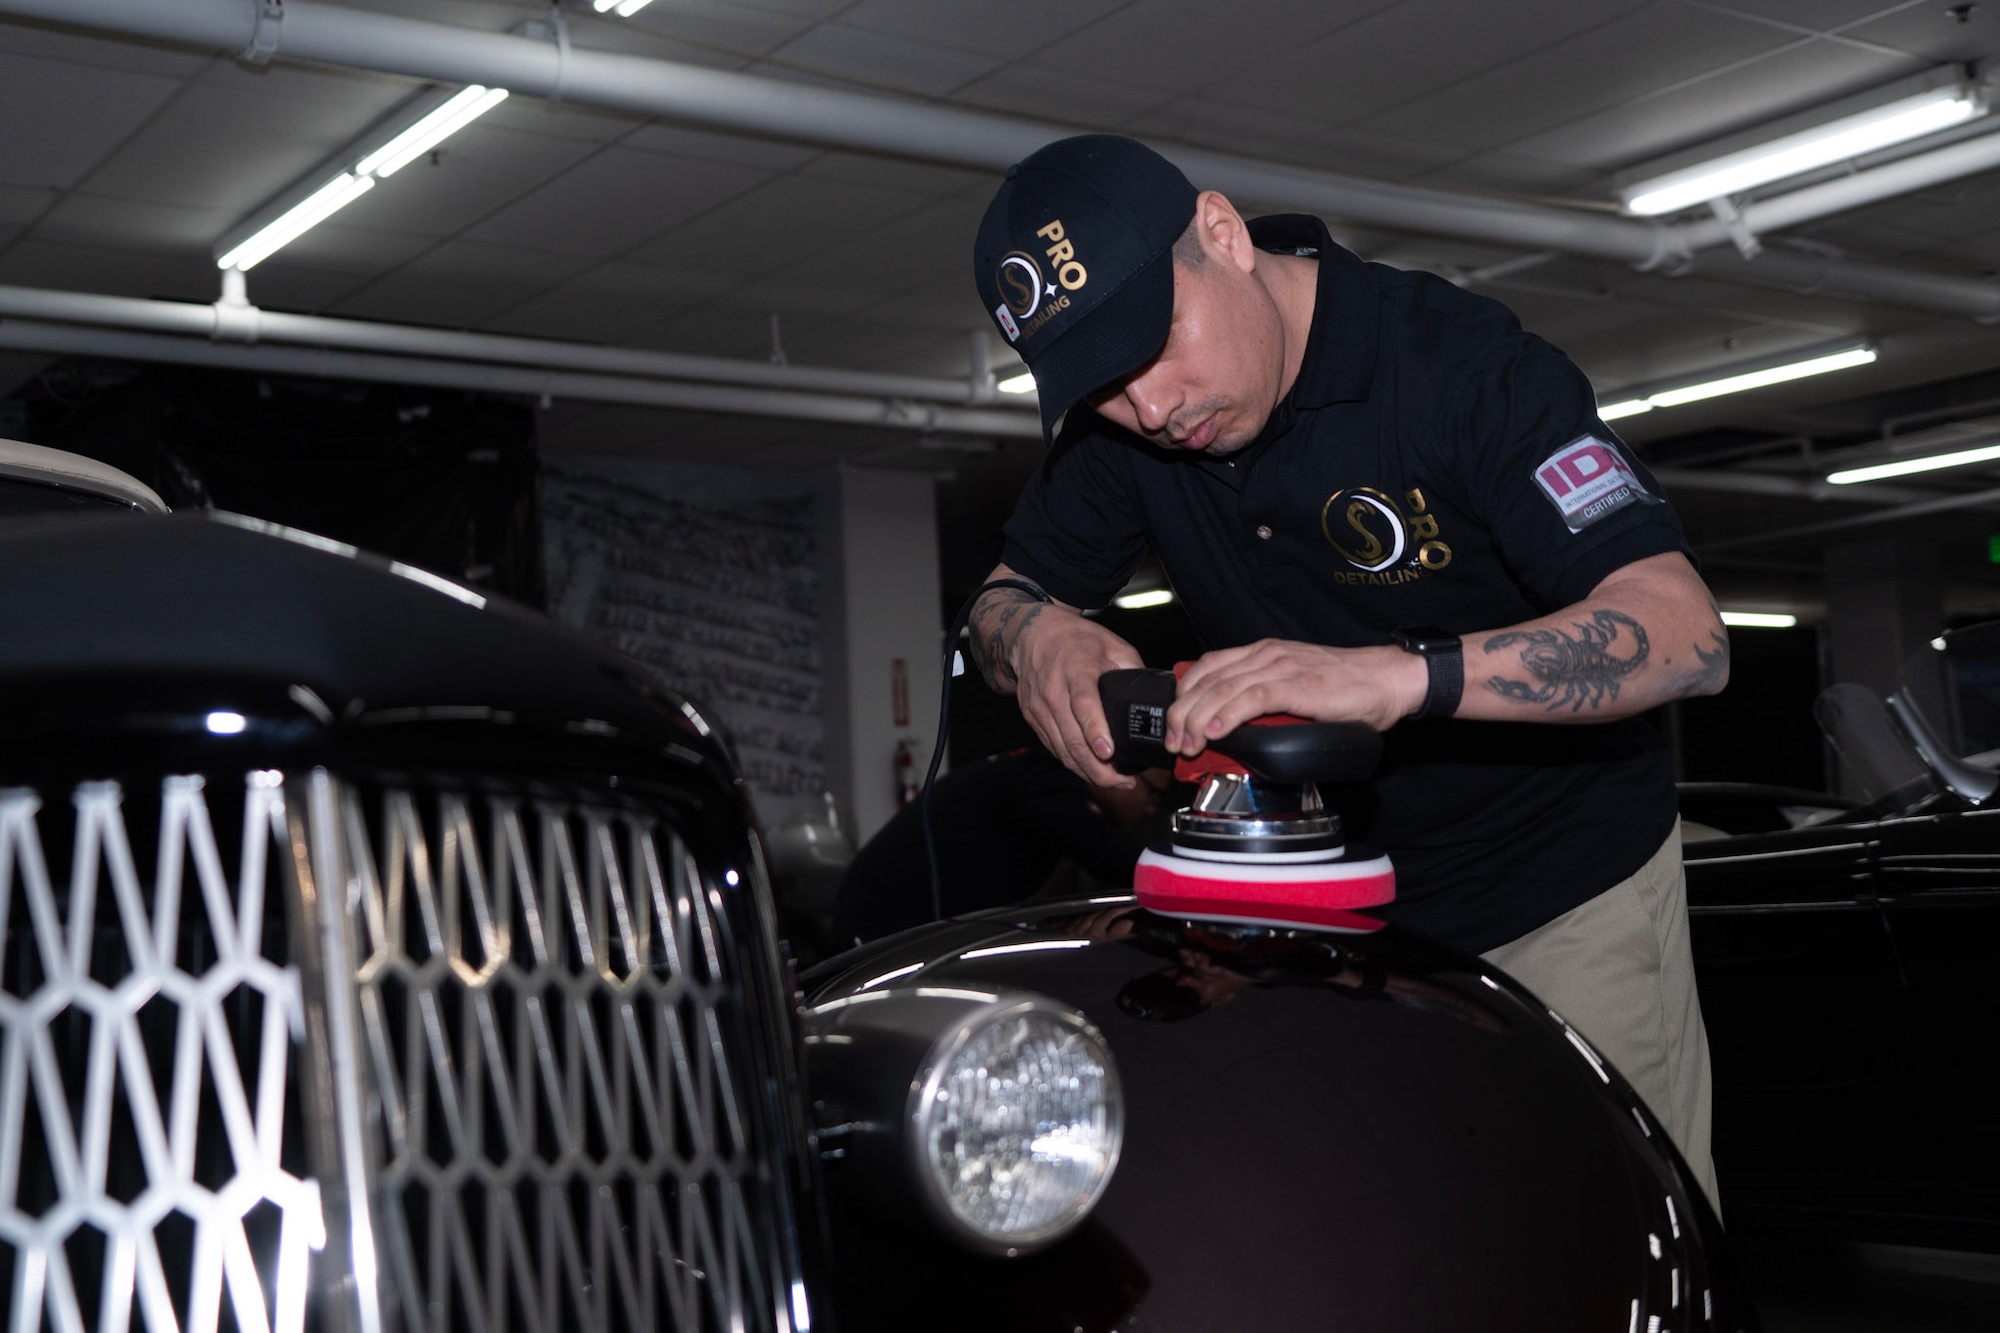
In practice, that means test sets that include both ends of the spectrum. We will run a light polish on a soft foam to see what “easy” can do, then jump to a microfiber and a non-diminishing compound to mark the other boundary. We compare not just how defects fall, but how the panel finishes, how the pad loads, and how the temperature climbs. This is where experience with product systems pays off, not brand loyalty.
What Os Pro Auto Detailing has learned from tough paints
A few patterns repeat. Tesla black often behaves softer than owners expect. It corrects quickly, then punishes sloppy finishing. Volkswagen and Audi metallic grays resist initial cuts, then finish crisply if you keep the pad clean and the passes slow. GM solid colors vary by plant and year more than people think. The take-home is simple: there is no single magic combo. There is a method and an eye.
One case sticks with us. A jet black SUV arrived with severe tunnel wash spirals, the kind that show like neon under a fuel station canopy. The meter read 105 to 115 microns across the hood, safe but not generous. A microfiber cutting pad with a medium compound removed 70 to 80 percent of the defects in two slow sets. Under cross light, faint haze remained. Swapping to a tight cell finishing foam with a fine non-diminishing polish restored the deep pool effect. After an IPA wipe, the gloss held. Measured again after polishing, the hood lost roughly 3 to 4 microns overall, a reasonable exchange for the visual gain.
After correction: protection options and their realities
Once you reveal a clean, flat surface, you want to preserve it. Waxes still have a place, mainly for their warm glow and easy application, but they fade in weeks to a few months. Sealants stretch that to months with better chemical resistance. Ceramic coating changes maintenance more than it changes appearance on its own. The coating anchors a slick, hydrophobic layer that slows etching, resists mild chemicals, and makes wash-induced marring less likely because dirt releases more readily. It does not turn a scratched car into a perfect mirror. It locks in what you have.
Paint protection film is a different tool. It is a physical barrier against impact and abrasion. If your commute includes gravel or winter sand, film on leading edges - bumper, hood strip, mirrors, rockers - will prevent the peppering that no polish can undo. Film also carries its own optical character. Modern films are impressively clear, but they still have edges and can slightly mute flake pop compared to naked clear. Many owners choose a hybrid: correction, then film on the high-risk zones, then ceramic coating on top of film and everywhere else for ease of maintenance.
Window tinting service belongs in the same conversation because it changes the cabin more than the paint, but it affects the detailer’s process. Fresh tint needs time to cure before you flood door seals with a pressure washer. Smart scheduling means tint first, then exterior work, or leave enough buffer so moisture does not creep under the film. On SUVs and trucks, reduced cabin heat from tint helps with coating flashes during summer, keeping solvent behavior more predictable.
Mobile detailing realities that affect correction
Mobile detailing platforms bring paint correction to driveways and office lots. The constraints are different from a controlled shop environment. Sunlight accelerates panel temperature and product flash. Wind carries dust onto open pads. Power draw and generator stability affect machine speed. Skilled mobile techs learn to stage cars in shade, erect temporary canopies, and use smaller working sections to keep temps tame. Correction can be done outside, but finishing to a high standard takes deliberate control of variables.
A full-service car detailing service that offers both shop and mobile appointments learns quickly where each setting shines. Heavy compounding, wet sanding, and multi-stage corrections almost always live better in the shop. One-step enhancements and maintenance polish work travel well, provided the prep wash and decontamination are done thoroughly.
A brief, realistic pairing of services
People often ask how ceramic coating and paint correction tie together. Correction gives you a flat, clear canvas. Coating preserves that canvas and changes maintenance. For daily drivers, a thoughtful single-stage correction paired with a quality ceramic coating offers a sweet spot: obvious visual improvement and longer wash intervals without pushing the clear too far. If the route is gravelly or you park on city streets, paint protection film on the front clip plus coating everywhere else makes hard sense. The car stays cleaner, and the high-risk zones stop collecting chips that no polish will erase.
When tint enters the picture, sequence matters. Apply tint, allow initial cure, then wash and correct the exterior. If someone wants both tint and a coating on the same day, communicate the drying windows and adjust. Rushing usually costs more time in do-overs.
Maintenance that keeps defects from coming back
- Pre-rinse heavily, ideally with a pressure washer, to move grit before you touch the paint. Use a dedicated contact wash with quality mitts and frequent mitt rinses. A one-bucket wash can be safe if you control contamination, but two buckets still help. Dry with plush, clean towels and light pressure. Blowers reduce contact and save edges and emblems from snagging towels. Decontaminate seasonally with iron removers and gentle clays that do not over-mar the clear. Inspect under point light after washes to catch early marring before it multiplies.
When to stop polishing
Every correction reaches a point where more is not better. If a deep scratch runs your fingernail, you can chase it for hours and remove half the surrounding clear, or you can accept a faint witness line that is only visible under direct light. The right choice depends on film build, panel location, and owner expectations. Risk lives at edges. Heat builds faster than you think. Products that promise miracles sometimes just fill well and lull you into a second pass you should not take.
At Os Pro Auto Detailing, we call this the stop rule. If a panel already meets the agreed gloss target and the remaining defects require aggressive tactics near a thin zone, we document, explain, and walk away. The integrity of the clear coat buys you years of safe maintenance. Thinning it for the last two percent looks great for a day and costs down the road.
Two short shop-floor snapshots
A white hatchback came in coated three years prior, garage kept but washed at quick bays. The coating still beaded, yet the gloss had dropped. Under light, faint wash marring covered the flat surfaces. The gauge read 120 to 140 microns, generous. A light polish on a fine foam restored crisp reflections and removed the veil without heavy correction. Because the coating was at end of life, we prepped and reapplied a fresh ceramic layer. The owner expected a miracle from the coating alone. The real change came from the polish. The coating simply kept it that way.
A silver sedan showed heavy water spot etching on the horizontal panels. No polish alone would remove the mineral crowns. We performed a two-stage correction on the hood and roof, beginning with a targeted wet sand in the 3000 grit range on the worst craters, then compounded and refined. The loss was measurable, around 8 microns in the sanded zones. Film went on the forward hood afterward. The owner planned a move to a hard-water area. Film and a consistent drying routine made more sense than annual heavy corrections.
The quiet value of lighting
You cannot fix what you cannot see. High CRI lights show color truth and edge detail that cheap work lights miss. Move the light low and across the panel to read texture and haze. Move it high to read general gloss. Sunlight still rules for final checks because it mixes a huge spectrum and reveals directionality. A car that looks perfect under one LED bar can blush with holograms under the sun if you finished with a rotary and did not cross-check with a DA.
Where a car detailing service fits
When people look for a car detailing service, they often expect a wash, vacuum, and maybe a spray wax. True paint correction is a different discipline. It borrows from body shop sanding protocols, photonics, and good housekeeping. The equipment matters, but judgment matters more. A shop that also offers window tinting service, ceramic coating, and paint protection film can sequence the work efficiently and help you make trade-offs that fit how you drive. It is not about loading a menu, it is about choosing the right tools and stopping at the right time.
Os Pro Auto Detailing occupies that middle ground daily. Some days the best move is a careful one-step to lift a daily’s gloss. Other days it is a measured multi-stage to pull clarity from a black show car, followed by film on the nose and a coating on top. The science is consistent. The art is in reading the panel, the owner, and the risks.
Final thoughts from the polishing line
Paint correction, at its core, is managing light by reshaping a transparent solid. Swirls, scratches, and haze are not mysteries. They are the normal result of friction, contamination, and human shortcuts, and they yield to careful, measurable work. Pads and polishes are levers, not magic. Protection products extend your wins, they do not replace them. And the smartest correction often ends one step earlier than your ego wants.
If you remember that every micron matters and verify with honest light and clean wipes, you will make sound choices, whether you are refining a single panel in a driveway or executing a multi-stage correction in a controlled bay. That is the line we walk at Os Pro Auto Detailing, one pass at a time.
Os Pro Auto Detailing
12748 NE Bel Red Rd, Bellevue, WA 98005
(206) 825-2040
FAQs
How long does ceramic coating last?
Ceramic coating typically lasts between 2 to 5 years, depending on the product used, vehicle condition, and how well the coating is maintained.
What is included in paint correction?
Paint correction involves removing surface imperfections such as swirl marks, light scratches, and oxidation through polishing. This process restores clarity and enhances the overall gloss of your vehicle’s paint.
Is ceramic coating worth it?
Yes, ceramic coating provides long-term protection against UV rays, contaminants, and environmental damage. It also makes cleaning easier and helps maintain your vehicle’s appearance over time.